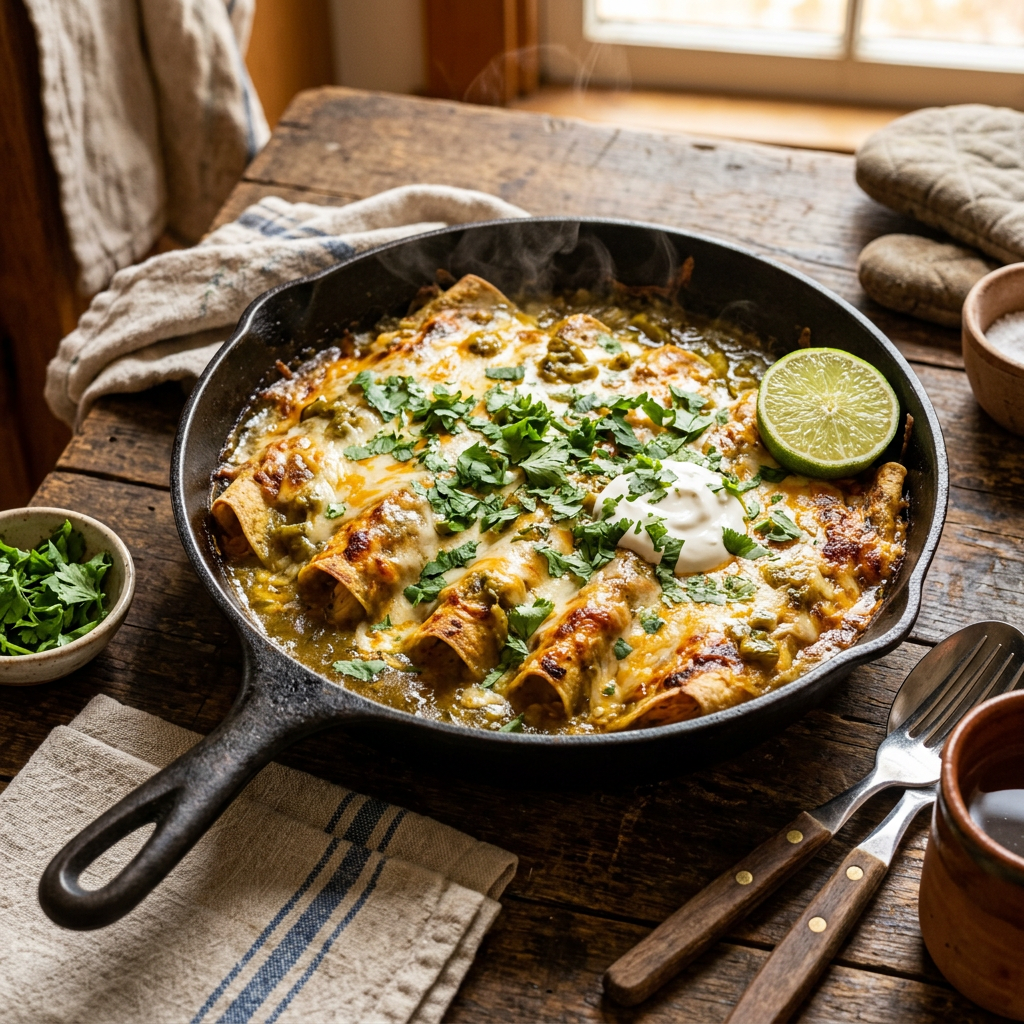
It was 5:15 on a Wednesday, I had a five-year-old orbiting my knees, and I made the mistake of asking what he wanted for dinner. He said, “the green enchiladas.” Not chicken nuggets. Not the beige spiral pasta he’d eat every night if I let him. The green enchiladas. I’ve been chasing green chile around the West since a San Antonio taqueria ruined me for regular breakfast in 2013, and somewhere along the way it seeped into my kid’s palate too.
That’s the whole pitch. Green chile chicken enchiladas are the most reliable weeknight dinner in my rotation — one pan, one sauce, no smoker, no eight-hour braise. Cold fridge to hot dish is about an hour, most of it oven time while you clean up. If you’ve read my post on Wyoming’s green chile culture, you know I keep chile in the freezer year-round so nights like this are possible.
A Quick Word on Where This Dish Comes From
Green chile enchiladas are Southwestern food, and the tradition that defines them belongs first and most famously to New Mexico. The Hatch Valley, a stretch of the Rio Grande in the south of the state, built its reputation growing the Anaheim-type long green chiles that get roasted and peeled by the bushel every fall. Chile is such a fixture there that “Red or green?” — a server asking which chile sauce you want — was made the official state question by the New Mexico legislature in 1996.
Wyoming isn’t New Mexico, but we sit at the north end of that same I-25 chile corridor, and the ingredient made the trip up here long ago. This is my Casper kitchen’s version — not a claim to authenticity, just a good weeknight dinner built on a borrowed ingredient.
Fresh, Frozen, or Canned Chile
Mid-September is peak roasting season, so if you’re reading this the week it posts, go find a roaster. Fresh-roasted chile, peeled and chopped, makes the best version of this sauce. But here’s what a Tuesday actually looks like: most of the time I’m using frozen roasted chile from the grocery store, and in a cooked sauce you’d struggle to tell the difference.
Canned diced green chiles work too. They’re milder and softer, so drain them well and consider a diced jalapeño with the onion to put heat back in. Whatever you use, taste it first — heat varies wildly batch to batch, and the sauce is easier to adjust before it’s on the tortillas.
Green Chile Chicken Enchiladas
Serves 6 · Prep 20 min · Cook 40 min
Ingredients
For the chicken:
- 2 pounds boneless, skinless chicken breasts or thighs
- 1 tablespoon neutral oil
- 1 teaspoon kosher salt
- 1 teaspoon ground cumin
- 1/2 teaspoon black pepper
For the green chile sauce:
- 3 tablespoons butter
- 1 small yellow onion, finely diced
- 3 cloves garlic, minced
- 3 tablespoons all-purpose flour
- 2 cups low-sodium chicken broth
- 1 1/2 cups roasted green chile, chopped (fresh, thawed frozen, or drained canned)
- 1 teaspoon ground cumin
- 1 teaspoon dried oregano, Mexican if you have it
- 1/2 teaspoon kosher salt, plus more to taste
- 1/2 cup sour cream
- 1 tablespoon fresh lime juice
For assembly:
- 12 corn tortillas (6-inch), or 8 flour tortillas
- 3 cups shredded Monterey Jack or pepper jack, divided
- Cilantro, sliced scallions, and sour cream, for serving
Instructions
- Cook the chicken. Pat dry and season with the salt, cumin, and pepper. Heat the oil in a large skillet over medium-high. Sear 5 to 6 minutes per side, then reduce to medium, cover, and cook until the thickest part reads 165°F — the USDA safe minimum internal temperature for all poultry. Thin cutlets get there in about 12 minutes; thick breasts can take 20. Go by temperature, not time — an instant-read thermometer removes the guessing.
- Rest and shred. Rest the chicken 10 minutes, then shred with two forks. You’ll have roughly 4 cups.
- Start the sauce. Melt the butter in a saucepan over medium heat. Cook the onion 5 minutes until soft, then the garlic 30 seconds more.
- Build the roux. Sprinkle in the flour and whisk constantly 1 minute — it should smell nutty, not raw. Add the broth in a slow stream, whisking smooth.
- Simmer. Add the green chile, cumin, oregano, and salt. Simmer gently 8 to 10 minutes, stirring, until it coats the back of a spoon.
- Finish off the heat. Pull the pan off the burner, wait a minute, then whisk in the sour cream and lime juice — adding dairy off heat keeps it from breaking. Taste and adjust salt now.
- Combine. Toss the chicken with about 1 cup of sauce and 1 cup of cheese.
- Soften the tortillas. Corn tortillas crack if rolled cold. Wrap the stack in a damp paper towel and microwave 30 seconds.
- Assemble. Heat the oven to 375°F. Spread 1/2 cup of sauce across the bottom of a 9×13 baking dish. Fill each tortilla with the chicken mixture, roll, and lay seam-side down. Pour the remaining sauce over the top and scatter on the last 2 cups of cheese.
- Bake. 20 to 25 minutes, until the sauce bubbles at the edges and the cheese is melted. Broil 2 minutes for browned spots. Rest 10 minutes before serving or it’ll slide apart.
Make Ahead and Freezer Notes
Assemble the pan, cover tightly, and refrigerate up to 24 hours before baking — add about 10 minutes to the bake since it goes in cold. The sauce alone keeps 4 days and gets better on day two.
For the freezer: assemble in a foil pan, skip the final cheese layer, wrap in plastic and then foil, and freeze. Use it within 2 to 3 months for best quality — it stays safe longer in a steady 0°F freezer, but texture and flavor start sliding after that. Thaw overnight in the fridge, add the cheese, and bake as directed plus 10 to 15 minutes.
What to Serve With Them
Cilantro-lime rice and black beans is the standard here, plus shredded iceberg with lime and salt to cut the richness. My son gets his with sour cream, which he uses less as a condiment than as a fire extinguisher.
The Wyoming green chile cheeseburger and the green chile breakfast burrito run on the same principle, and elk chili with Hatch green chile is where it all goes once the weather turns.
Make these, then tag @wyofood so I can see them. And if you’ve got a Wyoming green chile source I don’t know about, I’d like to hear it.
— Sean