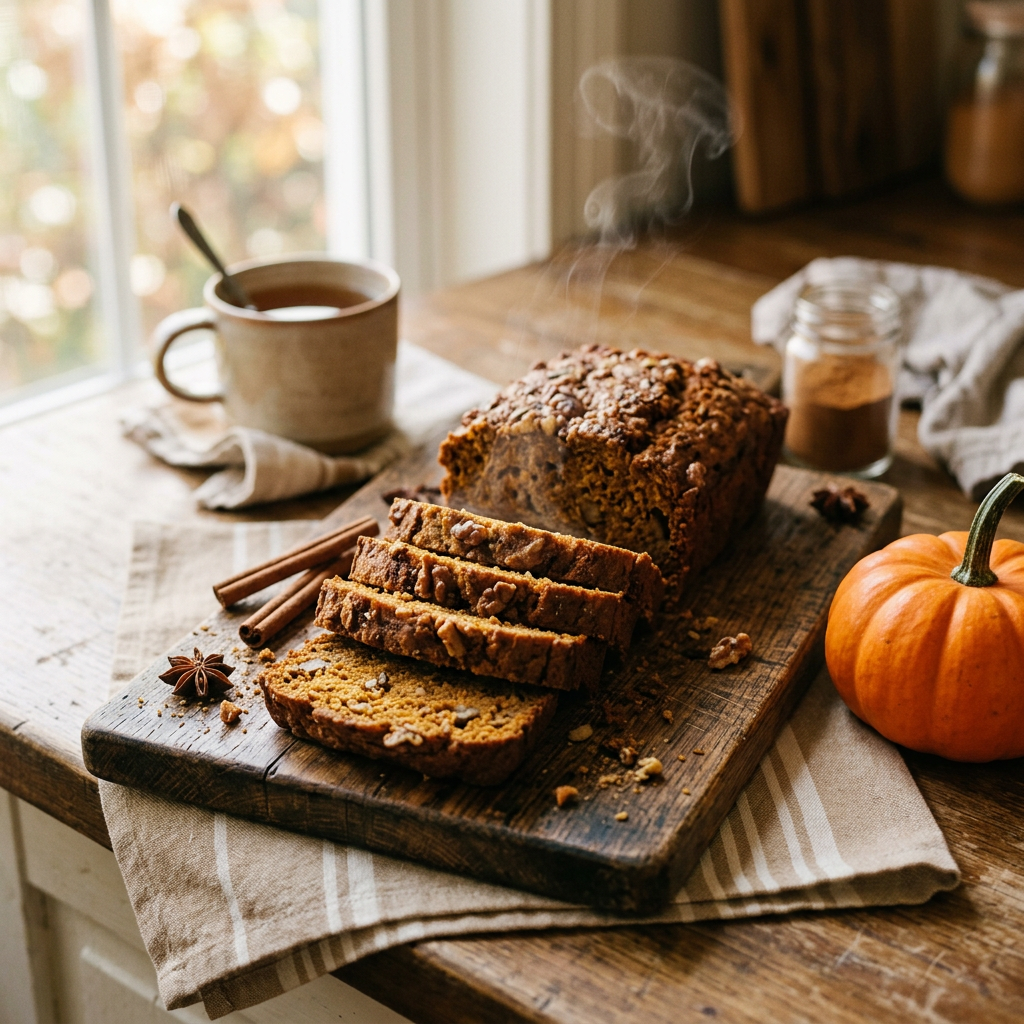
Last October I made a pumpkin bread so aggressively spiced that my son took one bite, set it down, and announced to the whole kitchen that it tasted like “the candle store.” He was four. He was also right. It tasted exactly like the aisle at the mall where they sell forty-dollar candles named things like Harvest Hearth, and it was sweet enough that Kimi, who will eat dessert at any hour of the day, slid her slice back toward me without a word. In our house, that is a court-martial.
I spent a good part of my adult life in uniform. I have read maps in the dark, followed op orders written by people who never had to execute them, and kept track of gear lists longer than this post. And I got beaten by a can label. I had grabbed pumpkin pie filling instead of pumpkin puree, then dumped my usual brown sugar and spice blend on top of it. Double sugar. Double spice. Candle bread.
So this year I rebuilt my pumpkin bread from the ground up and tuned it for baking at 5,100 feet, which is where my oven lives. The result is a moist, tender loaf that tastes like pumpkin first and spice second. Here’s what I learned on the way.
The Baking-Aisle Mistake That Got Me
On the shelf, two canned pumpkin products sit right next to each other, often from the same brand, in cans that look almost identical. One is 100% pure pumpkin, sometimes labeled pumpkin puree. That’s just cooked, mashed pumpkin. No sugar, no spice. The other is pumpkin pie filling or pumpkin pie mix, a completely different product that already has sugar, spices, and thickeners added so you can pour it into a crust and call it a pie.
Any bread recipe written around plain puree, including this one, is counting on you to bring all the sugar and spice yourself. Use pie filling instead and you’ve stacked the can’s sweetness and spice on top of the recipe’s. That’s not a subtle difference. That’s candle bread.
The fix is boring and it works: read the label every time. You want the words “100% pure pumpkin” or “pumpkin puree.” If you see “pie filling” or “pie mix,” put it back. I now physically turn every can around in the store like I’m inspecting a rifle, and my son thinks it’s the funniest thing he’s ever seen. Fine. No more candle bread.
Why I Use Canned Pumpkin (And Why I Sometimes Drain It)
There’s a certain kind of food blogger who wants you to roast a sugar pumpkin, scrape it, puree it, and strain it before you’re allowed to bake. If that’s you, go with God. I bake with canned pumpkin and don’t feel even a little bad about it. It’s thick, it’s on the shelf at every grocery store in town, and it’s ready when I am, which on a Wednesday night after work and bath time is not negotiable.
But here’s something most recipes don’t tell you: canned pumpkin puree varies in moisture from brand to brand, and even can to can. Some cans open up thick enough to stand a spoon in. Others look loose and shiny, with liquid sitting on top. That extra water goes straight into your batter, and it’s a classic reason a pumpkin loaf comes out dense, gummy, or underbaked in the middle even after the top looks done.
The fix is a well-known baker’s trick: if your puree looks noticeably wet, drain it. Scoop it into a fine-mesh strainer set over a bowl, or spread it on a few layers of paper towel, and let it sit for 10 to 20 minutes while you measure everything else. If the puree already holds its shape on a spoon, skip it. You’re not trying to dry it out, just get it back into the normal range.
You might notice the recipe below adds a little milk, and wonder why I’d drain liquid out with one hand and pour it back in with the other. The difference is control. The milk is a measured amount added on purpose for altitude (more on that in a minute). The water in a sloppy can is a random amount that changes every time you shop. Drain the random part, keep the measured part, and the bread comes out the same every time.
A Note for the Canners: Don’t Can Your Own Puree
If you read Why Wyoming Cans Everything last month, you know this state takes its pressure canners seriously. So somebody out there is thinking, “Why buy cans at all? I’ll puree a bunch of pumpkins this fall and can it myself.”
I thought the same thing. Then I looked it up. USDA and National Center for Home Food Preservation guidance says you should not home-can mashed or pureed pumpkin, or pureed winter squash. The only tested, safe home method is for pumpkin cut into roughly 1-inch cubes, and it has to be pressure canned. The official directions are about as blunt as government writing gets: “Do not mash or puree.”
The reason is density. Puree is thick, and its thickness changes from batch to batch, so there’s no way to guarantee heat reaches the center of the jar during processing. A cold center is a botulism risk, and botulism is not something you gamble on.
So if you want home-preserved pumpkin for baking, the safe route is to pressure can it in cubes following tested directions, then mash it fresh after you open the jar. I looked at all that and decided store-bought canned puree is the right call for my kitchen. Either way, respect the guidance. Somebody did the testing so we don’t have to find out the hard way.
The Part Where Pumpkin Is Actually Good for You
Let’s be honest: pumpkin bread is not health food. It has sugar and oil in it, and that’s why it tastes good. But the pumpkin itself is impressive. According to USDA FoodData Central, one cup of canned pumpkin (no salt added) has:
- About 83 calories
- Less than 1 gram of fat (about 0.7g)
- About 19.8 grams of carbohydrate and 2.7 grams of protein
- 7.1 grams of fiber, about 25% of the Daily Value
- Roughly 1,906 micrograms of vitamin A (as RAE), about 212% of the Daily Value
That vitamin A comes from beta-carotene and alpha-carotene, which your body converts into vitamin A after you eat them. And here’s the one that surprised me: canned pumpkin is a more concentrated fiber source than fresh pumpkin you cook at home. A cup of cooked fresh pumpkin has roughly 3 grams of fiber, compared to about 7 in canned, because canning concentrates it.
Why High Altitude Changes This Recipe
Casper sits at about 5,100 feet. If you’ve ever followed a sea-level recipe up here and watched a cake rise beautifully, then sink in the middle like a collapsed tent, you’ve met the problem.
With less air pressure pushing down on your batter, the gas from baking soda and baking powder expands faster and bigger, and the bubbles can pop before the bread’s structure sets around them. Liquid also evaporates faster up here, so things dry out more easily.
For guidance I lean on Utah State University Extension, a land-grant extension service, the same kind of outfit as the University of Wyoming Extension I trust for canning. For from-scratch quick breads and cakes at around 5,000 feet, they recommend:
- Decrease baking powder and baking soda by about 1/8 to 1/4 teaspoon for each teaspoon called for (for quick breads, a blanket reduction of about one-fourth).
- Decrease sugar by 0 to 2 tablespoons per cup.
- Increase liquid by 2 to 4 tablespoons per cup to make up for faster evaporation.
Many bakers also raise the oven temperature by about 25°F and shorten the bake time, which helps the bread set before those bubbles overexpand.
This recipe is already calibrated for high altitude. It’s the only altitude I’ve got. Compared to a sea-level version, I’ve trimmed the baking soda from 1 1/2 teaspoons to 1 1/4, trimmed the baking powder from 1 teaspoon to 3/4, taken 2 tablespoons out of the granulated sugar, bumped the milk from 1/3 cup to 1/2 cup, and raised the oven from 350°F to 375°F.
If you’re baking near sea level, reverse those moves: 1 1/2 teaspoons baking soda, 1 teaspoon baking powder, a full 1 cup of granulated sugar, 1/3 cup milk, and bake at 350°F, expecting it to take longer.
Two more things that matter at any elevation: once the flour goes in, don’t overmix. Fold just until the dry streaks disappear, because extra stirring builds gluten and makes a quick bread tough. And I use oil instead of butter in the batter. Oil stays liquid at room temperature, so the crumb stays soft for days. Butter goes on top of the slice, where it belongs.
Spiced Pumpkin Bread (High-Altitude Calibrated)
- Makes: 2 loaves (8 1/2 x 4 1/2-inch pans), about 20 slices
- Prep time: 20 minutes (plus 10 to 20 minutes draining, if needed)
- Bake time: 45 to 55 minutes at 375°F
- Calibrated for: about 5,000 feet (sea-level version at the end)
Gear
Affiliate links. I earn a small commission at no extra cost to you.
- USA Pan 8.5 x 4.5-inch loaf pans (set of 2): the exact size this recipe is built around, and they release a loaf clean every time.
- Reynolds parchment paper: line the pans with a sling and both loaves lift out in one piece.
- Etekcity digital kitchen scale: for the gram measurements above, which are more consistent than scooping flour by the cup.
- OXO Good Grips 8-inch strainer: for draining a wet can of pumpkin before it waterlogs the batter.
Ingredients
Dry:
- 3 cups (360g) all-purpose flour
- 1 1/4 teaspoons baking soda
- 3/4 teaspoon baking powder
- 1 teaspoon fine salt
- 2 teaspoons ground cinnamon
- 1 teaspoon ground ginger
- 1/2 teaspoon ground nutmeg
- 1/4 teaspoon ground allspice
- 1/4 teaspoon ground cloves
Wet:
- 1 can (15 ounces) 100% pure pumpkin puree, not pie filling (drained if wet)
- 4 large eggs, room temperature
- 2/3 cup neutral oil (vegetable, canola, or avocado)
- 1/2 cup whole milk
- 1 cup (200g) packed light brown sugar
- 3/4 cup plus 2 tablespoons (175g) granulated sugar
- 2 teaspoons vanilla extract
Optional add-ins (up to 1 cup total):
- Chopped toasted pecans or walnuts
- Semisweet chocolate chips
Optional streusel topping:
- 1/3 cup (40g) all-purpose flour
- 1/3 cup (65g) packed brown sugar
- 1/2 teaspoon ground cinnamon
- Pinch of salt
- 3 tablespoons cold butter, cubed
- 1/3 cup chopped pecans (optional)
Instructions
- Prep. Heat the oven to 375°F with a rack in the center. Grease two 8 1/2 x 4 1/2-inch loaf pans and line each with a parchment sling hanging over the long sides.
- Check the pumpkin. If the puree is loose or has liquid pooling on top, drain it in a fine-mesh strainer or on paper towels for 10 to 20 minutes. If it’s thick, use it as is.
- Make the streusel (optional). Combine the flour, brown sugar, cinnamon, and salt. Rub in the cold butter with your fingertips until it looks like wet sand with some pea-sized clumps. Stir in pecans if using, and refrigerate.
- Mix the dry ingredients. In a medium bowl, whisk the flour, baking soda, baking powder, salt, and all the spices until the color is uniform.
- Mix the wet ingredients. In a large bowl, whisk the pumpkin, eggs, oil, milk, both sugars, and vanilla until smooth, with no streaks of egg or lumps of brown sugar.
- Combine. Add the dry ingredients to the wet. Switch to a spatula and fold gently, just until no dry flour is visible. Fold in any add-ins with the last few strokes. Stop there.
- Fill the pans. Divide the batter evenly between the pans (about two-thirds full) and smooth the tops. Scatter the streusel over the top, if using, and press it in lightly.
- Bake. Bake 45 to 55 minutes, starting to check at 40. If the tops are getting deep brown around 35 minutes, tent loosely with foil.
- Test for doneness. Insert a toothpick into the center of each loaf. It should come out clean or with a few moist crumbs. Wet, shiny batter means another 5 minutes. The top should spring back when pressed lightly, and the center crack should look dry, not glossy.
- Cool. Cool in the pans on a rack for 15 minutes, then lift out by the parchment and cool completely, at least an hour, before slicing. A warm quick bread is still setting inside, and cutting it early makes the middle look gummy even when it’s fully baked.
Sea-level version: 1 1/2 tsp baking soda, 1 tsp baking powder, 1 cup granulated sugar, 1/3 cup milk. Bake at 350°F for roughly 55 to 65 minutes. Same doneness test.
Storage and Reheating
This bread is better on day two, once the spices settle in and the crumb gets moister. Two loaves means one for now and one for later.
At room temperature
Once completely cool, wrap the loaf tightly in plastic wrap or keep it in an airtight container for about 3 to 4 days. Wyoming air will steal moisture from anything left out, so press plastic wrap right against the cut end.
In the fridge
Well wrapped, it keeps up to a week. Cold firms the crumb, so let slices sit out 15 minutes or warm them briefly.
In the freezer
This is where the second loaf goes. Wrap it in plastic, then foil or a freezer bag, and it keeps about 3 months. Better yet, slice it first with parchment between slices, so you can pull out exactly one at a time, which is dangerous information to have in October. Thaw at room temperature for about an hour, or reheat from frozen.
Reheating
- Microwave: 10 to 15 seconds for a room-temperature slice, 30 to 45 seconds from frozen. Overdo it and it turns chewy.
- Oven or toaster oven: 350°F for about 5 minutes, loosely wrapped in foil if frozen.
- Cast iron (my favorite): Melt a little butter in a skillet over medium heat and toast a thick slice 1 to 2 minutes per side until crisp and golden. That’s how the last few slices of every loaf go in our house.
What to Serve It With
Coffee. That’s the whole list. A thick slice next to a mug of cowboy coffee, made properly, on a cold October morning is about as good as breakfast gets. Kimi takes hers with salted butter. My son wants the chocolate chip version and has opinions about chips per slice.
If you’re baking your way through fall like we are, put this next to our Dutch Oven Apple Crisp. Different tools, same season, and your house will smell like October should. Not like a candle store. Like actual food.
If you make this, I want to see it. Tag @wyofood on Instagram or find Wyo Food on Facebook and show me your loaf. Bonus points for telling me your elevation and how you adjusted. And if you’ve got a can-label horror story of your own, I’d love to hear I’m not alone.
— Sean