Every fall there’s a moment when the chest freezer stops being storage and turns into a logistics problem. This year’s green chile came home in late September, flat quart bags still smelling faintly of propane smoke. When I went to stack them, I found last year’s survivors hiding at the bottom. Not many, but enough to make me feel bad about it.
The Army taught me a few things I still use every day, and stock rotation is one of them. First in, first out. The old stuff doesn’t improve with age. It just sits there until somebody finds it during an inspection. My kitchen doesn’t have inspections. It does have Kimi, who has opinions about how much freezer space green chile gets compared to food we actually eat on a Tuesday.
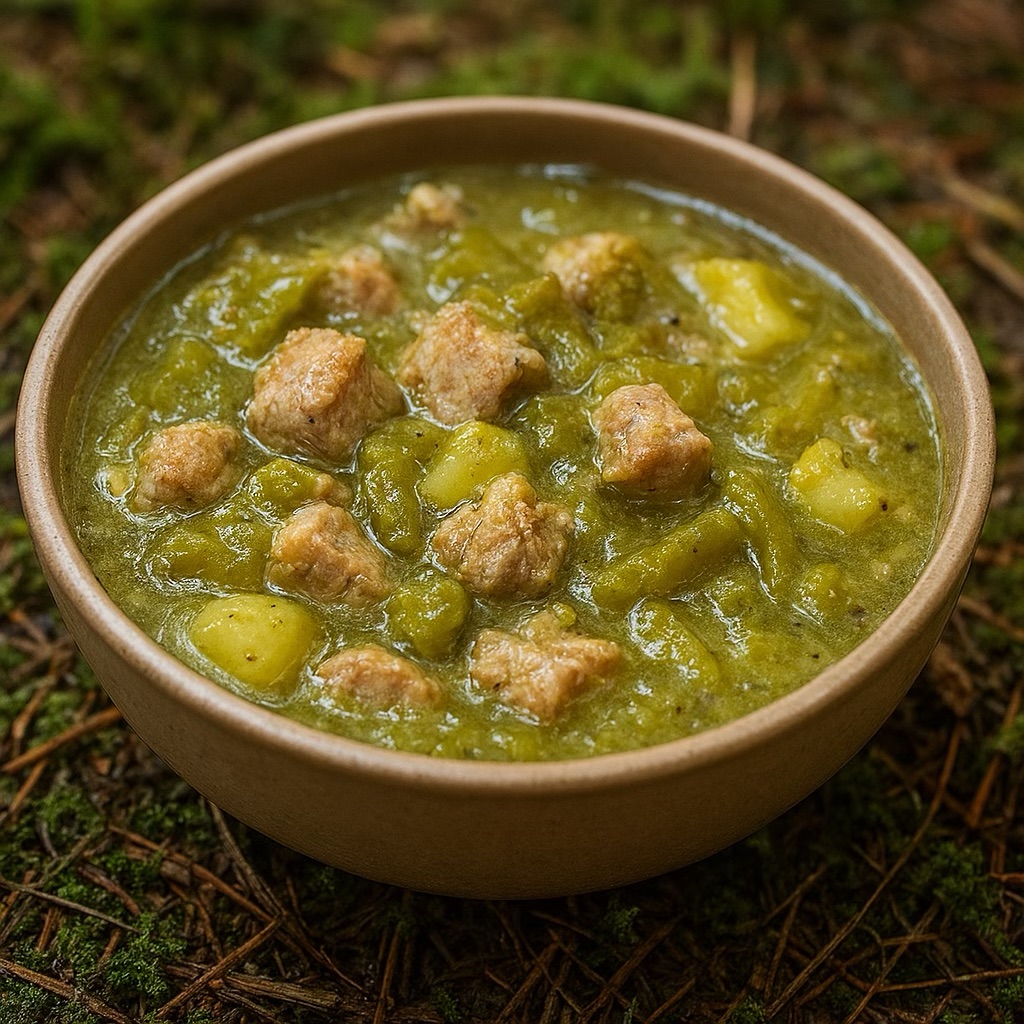
So the first week of October, the old bags come out and go into one pot. It isn’t going to be enchiladas, because we did green chile chicken enchiladas in September and those only use a cup and a half. I want a dish where the chile isn’t dressing up something else. That’s green chile pork stew: pork shoulder braised low and slow with onion, garlic, and potatoes, plus a full quart of roasted green chile that decides how every spoonful tastes.
It takes about three hours, mostly hands-off, and the house smells incredible the whole time. My five-year-old calls it “the green soup.” I’ve given up correcting him. You’re getting the full explanation instead.
What Green Chile Stew Is (and What It Isn’t)
Green chile stew is New Mexico food first. Pork or beef, roasted green chile, potatoes, onion, garlic, and usually a little cumin get simmered in broth until the meat gives up. It’s the eat-it-with-a-spoon side of the obsession I wrote about in Wyoming’s green chile culture.
People mix it up with two cousins. Mexican chile verde is built on tomatillos, which give it a tart backbone this stew doesn’t want. Denver-style green chili, which I ate plenty of when the Army had me in Colorado, usually runs thicker, often includes tomatoes, and is really made for smothering burritos. It’s a sauce with pork in it.
Mine lands somewhere between the two. I want it thicker than soup, enough to cling to a torn piece of tortilla, but thinner than chili, so it still pools in the bowl. There are no tomatoes and no tomatillos, just pork, chile, and the few things that help them along.
The Pork: Why Shoulder, and Which Part of It
Braises want hard-working meat. The shoulder spends its whole life holding up the front of a pig, and all that work shows up as connective tissue. Cooked slow in liquid, that collagen melts into gelatin. The meat turns tender, and the broth gets a body that flour can’t fake. It’s the same logic as my Dutch oven pot roast, just a different animal.
“Pork shoulder” covers two cuts. The one you want is the Boston butt, which despite the name is the upper part of the shoulder. It’s well marbled, with fat running through the muscle, so it stays juicy through a long braise. The picnic shoulder is the lower part, down toward the front leg. It’s leaner and often sold bone-in with the skin on. It works, but you do more trimming and get less back for it.
Buy a whole butt and cube it yourself. Packages labeled “pork stew meat” can be trimmings from more than one cut, so some pieces go tender at hour two while others are still fighting you. Trim off the thick fat cap and any hard bits, but leave the marbling alone. That fat is what keeps the stew from tasting like boiled pork. Cut the meat into 1½-inch cubes, since they shrink more than you’d expect. If you bought bone-in, put the bone in the pot for the braise. It’s free flavor.
Plenty of Wyoming families buy pork by the half or whole hog, from a neighbor or at a county fair livestock sale. If your freezer is stacked with shoulder roasts in white butcher paper, this is what they’re for.
The Chile: Hatch, Pueblo, and How Much Is “Enough”
I’m not reopening the Hatch-versus-Pueblo debate. Both are great, and the best chile is whatever’s in your freezer. In this stew, though, they do different jobs.
Roasted green chile breaks down over a long simmer, and in my pot the thinner-walled Hatch goes fastest. After a couple of hours it loses its shape and becomes the flavor of the broth itself, grassy, roasted, and a little sweet. Pueblo chiles are the Mirasol type grown around Pueblo, Colorado. The name means “looks at the sun,” because the pods grow pointing up. Their walls are thicker, and they hold their shape better. So when I have both, the Hatch goes in early and the Pueblos go in late.
Quantity is where most green chile stews go wrong. One little can of chiles in a pot of pork and potatoes isn’t green chile stew. It’s pork stew that has heard of green chile. If the chile is the main character, use a full quart, four cups of roasted, chopped chile for three pounds of pork. My rule of thumb is at least a cup of chile per pound of meat.
Then split it. Half goes in at the start, where it cooks down and flavors everything. The other half goes in with the potatoes for the last stretch, so it still tastes like fresh-roasted chile when it hits the bowl. The first round gives you depth, and the second gives you brightness and something to bite into.
Fresh, Frozen, or Canned
Fresh-roasted is best, and early October may still turn up the tail end of the season. If you can’t find New Mexico or Pueblo chiles, grocery-store Anaheims are close relatives. They roast fine under the broiler and run a little milder.
Frozen is what I use most of the year, and after a long braise it’s hard to tell from fresh. Thaw it overnight in the fridge and add the liquid from the bag, because that’s chile juice. If you don’t live near a roaster, this 10-pound frozen Hatch variety pack is five pounds of mild and five of extra-hot, which is how our house runs anyway. (Affiliate link. I earn a small commission at no extra cost to you.)
Canned works in a pinch. The little 4-ounce cans hold roughly half a cup each, so the big 27-ounce cans of Hatch chopped green chile make more sense here. Canned chile is softer and usually milder, and some brands add salt, so taste before you salt the stew.
Technique: Where the Flavor Actually Comes From
Sear Like You Mean It
With a short ingredient list, nothing covers for a weak step. The biggest difference between a stew that tastes like something and one that tastes like wet pork is how hard you brown the meat.
Pat the cubes dry, season them, and toss them in flour right before they hit the pot. Floured too early, they turn pasty. Sear over medium-high heat in three batches with space around every piece. A crowded pot steams the meat gray. Leave each piece alone for three or four minutes until it has a dark crust.
The flour helps the crust form, and later it slowly thickens the stew. It also browns faster than bare meat, so watch the bottom of the pot. Dark brown fond is flavor, but black fond is bitter. If it’s heading toward black, deglaze with a splash of broth between batches and pour it over the seared meat.
Build the Base
Cook the onions 8 to 10 minutes, until golden at the edges, and let their moisture loosen the browned bits. Add the garlic, cumin, and oregano for a minute so the spices bloom in the fat. Cumin dumped straight into broth tastes dusty. Toasted first, it tastes like it belongs. Deglaze with broth and scrape the pot clean.
Get the Consistency Right
Drag a spoon through the pot. The stew should part, then slowly close back up. In the bowl it should pool around the meat and potatoes but cling rather than run, like a light gravy.
The flour does most of that work and the potato starch does the rest. At the end, smash a few potato chunks against the side of the pot and stir them in. If it’s still thin, simmer it uncovered for 10 to 15 minutes. If it’s too thick, which often happens on day two, add broth. If a spoon stands up on its own, you’ve made chili.
A Note on Cooking at Altitude
Casper sits at about 5,150 feet. According to USDA’s Food Safety and Inspection Service, water boils around 202°F at 5,000 feet, and moist-heat methods like braising can take up to 25 percent longer. The recipe times below have some cushion built in, but judge by the fork, not the clock.
Potatoes, Not Hominy
Hominy versions exist and they’re good, but hominy pushes the dish toward posole, which deserves its own post. I’m sticking with potatoes. They soak up the chile broth, thicken the stew, and make it a full meal, which matters when your five-year-old treats any side vegetable as the start of a negotiation.
Use Yukon Golds. They hold their shape but soften enough at the edges to feed the broth. Cut them into 1-inch chunks and add them for the last hour or so. If they go in at the start, they’ll be mashed potatoes by the end.
Gear That Helps
Affiliate links. I earn a small commission at no extra cost to you.
- Lodge 6-quart enameled cast iron Dutch oven: the right size for this batch, and it goes from stovetop to oven.
- ThermoPro TP15 instant-read thermometer: for checking the pork and making sure leftovers are fully reheated.
Green Chile Pork Stew
Serves 6 | Prep 30 minutes | Cook about 3 hours
Ingredients
- 3 pounds boneless pork shoulder (Boston butt), trimmed and cut into 1½-inch cubes (or about 3¾ pounds bone-in; save the bone)
- 2 teaspoons kosher salt, plus more to taste
- 1 teaspoon freshly ground black pepper
- ⅓ cup all-purpose flour
- 3 tablespoons lard, bacon fat, or neutral oil, divided
- 2 medium yellow onions, diced
- 6 garlic cloves, minced
- 2 teaspoons ground cumin
- 1½ teaspoons dried oregano, Mexican if you have it
- 5 cups low-sodium chicken broth, divided, plus more as needed
- 4 cups (1 quart) roasted green chile, peeled, stemmed, and chopped (fresh, thawed frozen with its liquid, or canned), divided
- 1½ pounds Yukon Gold potatoes, cut into 1-inch chunks
- 1 lime
- For serving: warm flour tortillas, chopped cilantro, sour cream, shredded Monterey Jack, and extra hot chile
Instructions
- Heat the oven and season the pork. Heat the oven to 325°F with a rack in the lower-middle position. Pat the pork cubes dry with paper towels and season them all over with the salt and pepper.
- Dredge. Right before searing, toss the pork with the flour until lightly coated, then shake off the excess.
- Sear in batches. Heat 1 tablespoon of the fat in a 6-quart Dutch oven over medium-high heat until it shimmers. Add about a third of the pork in a single layer with space between the pieces. Sear without moving for 3 to 4 minutes, until deep brown, then turn and brown at least one more side, another 3 to 4 minutes. Move to a bowl. Repeat with the rest of the pork, adding more fat as needed. If the bottom of the pot is darkening too fast, deglaze with a splash of broth between batches and pour it over the seared meat.
- Cook the onions. Lower the heat to medium. Add the remaining fat and the onions and cook 8 to 10 minutes, stirring and scraping the bottom, until soft and golden at the edges.
- Bloom the aromatics. Add the garlic, cumin, and oregano and stir constantly for about 1 minute, until fragrant.
- Deglaze. Pour in 1 cup of the broth and scrape the bottom of the pot until it’s clean.
- Start the braise. Return the pork and any juices from the bowl to the pot. Add the remaining 4 cups of broth, 2 cups of the green chile, and the bone if you have one. Stir. The liquid should just about cover the meat; if it doesn’t, add a little more broth or water. Bring to a simmer on the stovetop, cover, and move to the oven. Braise 1½ hours.
- Add the potatoes and second round of chile. Stir in the potatoes and the remaining 2 cups of green chile. Return to the oven with the lid slightly ajar and cook 45 to 60 minutes more, until the potatoes are tender and the pork is fork-tender. At higher elevations, allow an extra 20 to 30 minutes.
- Check doneness by texture. Pull out a cube of pork and press it with the side of a fork. It should break apart with almost no pressure. If it pushes back, give it another 20 minutes and check again.
- Finish. Remove the bone, if used. Skim any pooled fat off the surface. Smash a few potato chunks against the side of the pot with a spoon and stir them in to thicken. If the stew is still thin, simmer uncovered on the stovetop for 10 to 15 minutes. If it’s too thick, add broth a splash at a time. Squeeze in the juice of half the lime, taste, and adjust the salt.
- Rest and serve. Let the stew sit off the heat for 10 minutes to settle. Serve with the remaining lime cut into wedges, warm tortillas, and toppings.
Doneness and Food Safety
Pork carries a lot of old baggage, so here are the numbers. USDA’s safe minimum for whole cuts of pork, such as roasts and chops, is 145°F measured with a food thermometer, followed by a three-minute rest. USDA lowered it to that in 2011 from the old 160°F recommendation. Ground pork still needs to reach 160°F.
For this stew, the safety number isn’t really the question. Your pork will pass 145°F early in the braise and keep climbing. At 145°F it’s safe, but the collagen hasn’t broken down yet, so it’s tough. Like a pot roast, a braise is done when the texture is right. Pork shoulder generally turns fall-apart tender somewhere around 195 to 205°F internal. With 1½-inch cubes, the fork tells you more than a thermometer. If a cube pushes back, it isn’t overcooked. It’s undercooked, and it needs more time.
Variations
Slow Cooker
Do the sear, onions, and deglaze on the stovetop, because that’s where the flavor comes from. Move everything except the potatoes and the second round of chile into the slow cooker, using a cup less broth. Cook on low until the pork is nearly tender, usually 6 to 8 hours depending on your cooker. Then add the potatoes and the rest of the chile, switch to high, and cook until the potatoes are tender, roughly another 1 to 1½ hours.
Wild Game
Elk or deer shoulder works, but it’s lean. Sear in bacon fat or lard, and think about adding a pound of pork shoulder for richness. If you’ve got more elk to use up, my elk chili with Hatch green chile is the other place a lot of ours ends up.
Heat Level for Mixed Company
The adults in our house and the five-year-old don’t agree on heat, so the pot gets mild chile and the hot chile goes on the table. Heat varies from batch to batch even at the same labeled level, so taste a piece before it goes in. It’s easier to add heat at the table than to take it out of a stew.
What to Serve With It
Warm flour tortillas are the right tool: tear, scoop, repeat. Skillet cornbread with crisp edges is the other classic, and a little honey butter plays nicely against the chile.
A fried egg on top turns leftovers into breakfast. Break the runny yolk into the broth. It’s the same idea behind my green chile breakfast burrito, just with a spoon.
Put toppings out and let everyone help themselves: Monterey Jack, sour cream, cilantro, lime wedges, and thin-sliced radishes for crunch. On day two, try a Denver-style smothered burrito. Ladle hot stew over a bean-and-cheese burrito, top it with more cheese, and broil until it bubbles. I spent enough time in Colorado that I’m not apologizing.
Storage and Reheating
Like most braises, this one’s better on day two. Here’s how to get it there safely without wrecking the texture.
Cool it quickly. USDA says to refrigerate leftovers within two hours. Don’t put the whole Dutch oven in the fridge, because the middle of a big pot cools too slowly. Divide it into shallow containers.
Refrigerator: 3 to 4 days, airtight. It’ll come out of the fridge looking almost solid. That’s gelatin from the pork shoulder, and it’s a good sign. It turns back into stew as soon as it’s warm.
Freezer: USDA puts frozen leftovers at 3 to 4 months for best quality. They stay safe indefinitely at 0°F, but they lose moisture and flavor over time. I freeze it flat in quart bags, the same way I freeze chile. One caveat is that potatoes can come back grainy after freezing. If you’re cooking a batch to freeze, set that portion aside before the potatoes go in. When you reheat it, add fresh 1-inch chunks and simmer until tender, about 20 minutes.
Thawing: Overnight in the fridge is easiest. You can also reheat straight from frozen in a saucepan over low heat. It just takes longer.
Reheating: Use a saucepan over medium-low heat with a splash of broth or water, stirring now and then. USDA’s guidance is to reheat leftovers to 165°F and bring soups and sauces to a rolling boil, then turn it back down. Starting on high scorches the bottom and breaks up the potatoes. For single bowls in the microwave, cover with a vented lid, stir halfway, and check a couple of spots for cold pockets.
Reheat only what you’ll eat, and finish each bowl with a squeeze of lime and a spoonful of fresh chile to bring the brightness back.
That’s the freezer rotated and the oldest chile put to its best use. If you make it, tag @wyofood on Instagram or Facebook. I want to see your bowl. And tell me what’s in your freezer, because I can’t be the only one running a rotation.
— Sean