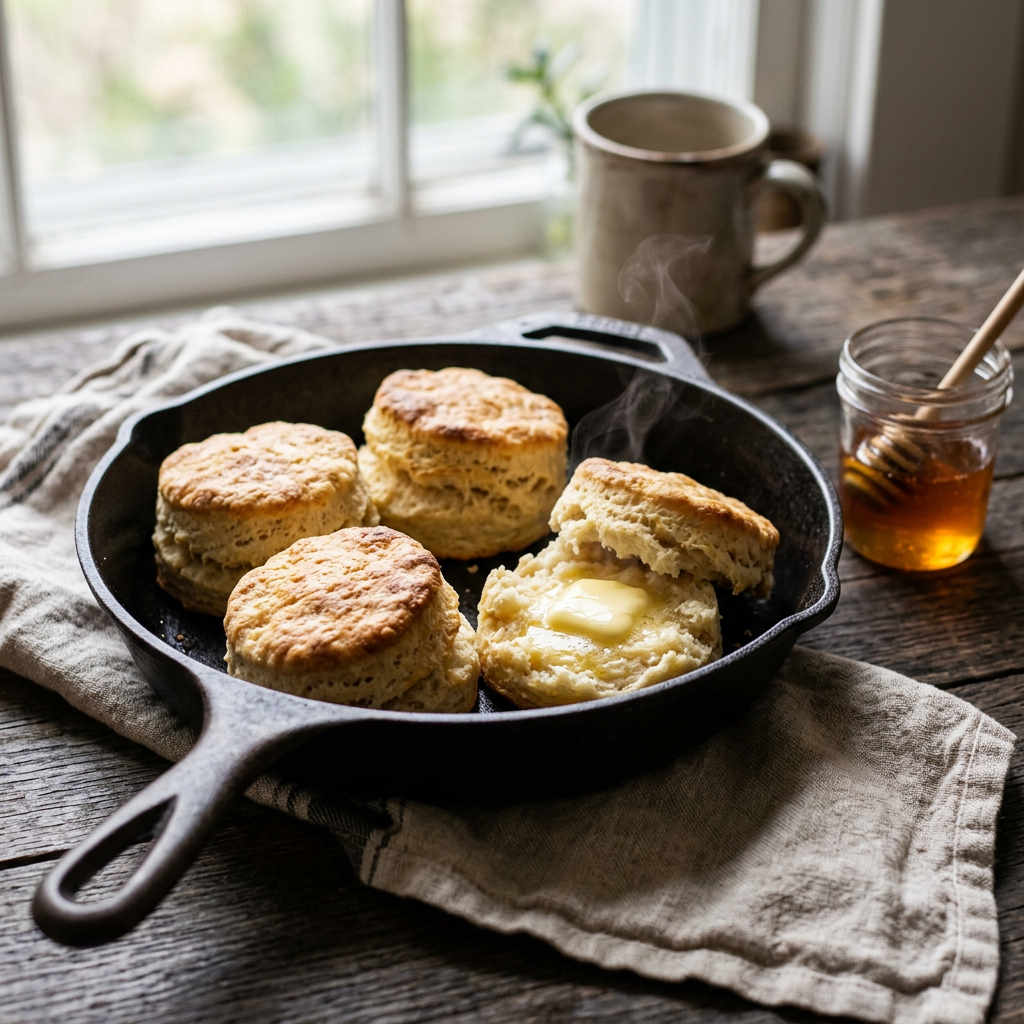
The biscuit is never the main event, and it usually decides whether dinner works anyway. You can nail the steak, get the gravy smooth and peppery, and then set a dense, pale, slightly bitter hockey puck next to it, and the whole plate goes flat. Get the biscuit right, tall and tender, with layers that pull apart and soak up whatever’s on the plate, and a pretty ordinary dinner starts to feel like a real meal.
Earlier this week I posted my Chicken-Fried Steak with Cream Gravy and promised a high-altitude buttermilk biscuit recipe to go with it. This is that recipe. These are built for mopping up cream gravy, and they’re also good next to a bowl of chili, split open with honey and butter, or eaten standing at the counter while they’re still too hot. (That last one is my personal specialty.)
Here’s the funny part, and it’s the honest part too: after everything I learned calibrating cake-like breads for our altitude here in Casper (about 5,150 feet), biscuits turned out to need a lot less fussing than I expected. They need some. Just not much. Let me explain why, and then we’ll bake.
What Altitude Actually Does to a Biscuit (and Why It’s Not a Cake)
When we moved to Wyoming from outside St. Louis in 2022, I assumed altitude was going to wreck every single thing I baked. Some of that fear was earned. Cake-like batters really do behave differently up here, which is why I ended up working through a whole set of adjustments for my Spiced Pumpkin Bread (High-Altitude Calibrated). So when I turned to biscuits, I went looking for real guidance instead of guessing.
The most useful source I found is the Colorado State University Extension’s High Altitude Food Preparation guide. A few points from it set up everything else in this post:
- Above about 3,000 feet, lower air pressure starts to change how food cooks. At 5,000 feet, atmospheric pressure is about 12.3 psi, compared with 14.7 psi at sea level.
- Liquids evaporate faster and boil at a lower temperature. Water boils at roughly 203°F at 5,000 feet instead of 212°F.
- Leavening gases expand more quickly. That’s the big one for baking. The bubbles from baking powder and baking soda grow faster and bigger with less air pressing back on them.
In a cake, that fast expansion is a problem. The batter is wet and delicate, the bubbles balloon before the structure sets, and then the whole thing collapses. That’s why cakes (and cake-like quick breads such as pumpkin or banana bread) get a stack of adjustments up here: less leavening, less sugar, sometimes more liquid, and a hotter oven.
Biscuits are a different animal. CSU says the cell structure of biscuits and muffin-type quick breads is firm enough to handle the increased internal pressure at high altitude without adjustment. A biscuit dough is stiff, low in sugar, and sets fast in a hot oven, so it doesn’t balloon and collapse the way a cake batter does.
So where’s the catch? CSU points out that at altitude, biscuits can pick up a bitter or alkaline flavor when the baking soda or baking powder isn’t fully neutralized. When that happens, its advice is that cutting back the baking soda or powder slightly will usually help. In other words, the problem to watch for up here isn’t collapse. It’s a biscuit that rises fine but tastes a little soapy or metallic.
There’s one more piece. CSU notes that flour tends to be drier at altitude and can absorb more liquid, and that low humidity dries food out faster. Anybody who has lived through a Wyoming winter (cracked knuckles, static shocks every time you touch a doorknob) won’t be surprised. In biscuit terms, that means the dough may want a splash more buttermilk than a sea-level recipe calls for.
And the guidance I keep coming back to: “Do not assume your sea-level recipe will fail. Try it first. Try the smaller adjustment first.” That’s the approach behind this recipe. It’s a pretty standard buttermilk biscuit with two small changes: a little less leavening and a little more buttermilk. No oven temperature bump. That cake advice (CSU suggests raising the temperature 15 to 25°F for cakes) doesn’t really apply to a biscuit that already bakes at 450°F.
The Ingredients and Why They’re There
Six ingredients do most of the work here, plus a little melted butter for the tops. Each one has a job.
All-purpose flour
Plain all-purpose flour makes a sturdy, tender biscuit that holds its layers. Plenty of biscuit bakers prefer a softer, lower-protein flour, and if you have one, go for it, but you don’t need a specialty bag. I recommend weighing your flour (250 grams) rather than scooping. Scooping straight from the bag packs it down, and with flour that’s already dry from our climate, extra flour is the fastest way to a crumbly biscuit.
Baking powder and baking soda
This is where the altitude adjustment lives. A typical sea-level biscuit with 2 cups of flour uses about 1 tablespoon (3 teaspoons) of baking powder. My starting point for 5,000+ feet is 2 teaspoons, plus 1/4 teaspoon of baking soda. The soda reacts with the acid in the buttermilk, which helps with browning and tang, but too much of it is exactly what causes that soapy aftertaste. Keeping both on the lean side is the “smaller adjustment first” CSU talks about.
Treat these numbers as a starting point, not gospel. Kitchens, flours, and ovens vary. If your biscuits taste great but you want a little more height, nudge the baking powder up by 1/4 teaspoon next time. If you still taste bitterness, pull it back a bit more.
Also: check the date on your baking powder. Old leavener is behind a lot of flat biscuits, and it’s not the altitude’s fault.
Cold butter
Butter is where the flaky layers come from. Cold pieces of butter scattered through the dough melt in the hot oven, release steam, and push the layers apart. If the butter melts into the flour before it hits the oven, you lose that and end up with something closer to a scone. I use a full stick (1/2 cup) of unsalted butter, cubed and kept in the fridge (or freezer for 10 minutes) until the moment it goes in.
Buttermilk
Buttermilk brings tang, tenderness, and the acid that activates the baking soda. I call for 3/4 cup plus 1 to 2 tablespoons. That extra splash covers the drier flour you tend to get up here. Start with 3/4 cup, then add more a tablespoon at a time until the dough just comes together.
No buttermilk? The common backup is “soured milk”: put 1 tablespoon of lemon juice or white vinegar in a measuring cup, add milk up to the 1-cup line, stir, and let it sit for 5 to 10 minutes. You’ll only use about 3/4 cup plus a splash of it. It’s thinner and a little less tangy than real cultured buttermilk, so the results won’t be identical, but it’ll get you a good biscuit in a pinch.
Salt and a little sugar
Kosher salt for flavor, and just a teaspoon of sugar. The sugar isn’t there to make them sweet; it helps a touch with browning and rounds out the tang. These are savory biscuits, built for gravy.
Technique: Where Biscuits Are Won or Lost
Honestly, technique matters more than altitude here. None of these steps are hard, but each one does something.
Cut the butter in, but not all the way
Whisk the dry ingredients together, then work the cold butter in with a pastry cutter, two forks, or your fingertips. You want pea-sized pieces, with a few bigger, flatter bits mixed in. If you’re using your hands, work fast. Warm hands melt butter. If the butter starts to feel soft or greasy, put the whole bowl in the freezer for 5 to 10 minutes.
Mix gently, stop early
Pour in the buttermilk and stir with a fork or spatula just until a shaggy dough forms. It should look a little rough and unfinished. Overmixing builds gluten, and gluten makes biscuits tough and chewy. If there are dry bits at the bottom of the bowl, drizzle in another tablespoon of buttermilk rather than stirring harder.
Fold for layers
Turn the dough out onto a lightly floured counter and pat it into a rough rectangle. Fold it in thirds like a letter, turn it 90 degrees, pat it out again, and repeat. Three or four folds is plenty. This stacks layers of butter and dough, and it’s what gives you those biscuits that peel apart in sheets.
Cut straight down
Pat the dough to about 1/2 inch thick (a little thicker is fine if you want taller biscuits). Flour a 2 1/2-inch round cutter, press it straight down, and pull it straight up. Don’t twist. Twisting pinches the edges shut, and sealed edges can’t rise as freely. Sharp, clean cuts rise straighter. If you don’t have a round cutter, a sharp knife and square biscuits work just as well, with no scraps to deal with.
Gently press the scraps together (don’t knead them) and cut a couple more. Those last biscuits will be a bit less pretty. Nobody minds.
Chill, crowd, and bake hot
If the dough feels warm or soft by the time you’re done cutting, put the whole pan in the fridge or freezer for 10 minutes. Cold butter going into a 450°F oven is what you want.
Set the biscuits on a parchment-lined baking sheet. If you place them so they’re just touching, they’ll lean on each other and rise taller with soft sides. Spaced apart, they get crispier edges all the way around. Either way is right; it depends on what you like.
A heavy, light-colored aluminum pan helps biscuits bake evenly without scorching the bottoms. If you’re shopping for one, Nordic Ware’s Naturals half sheet pans get an honorable mention here, and the listing I found is a two-pack, which is handy if you bake a lot. (Affiliate link; I may earn a small commission if you buy, at no extra cost to you.) Any sturdy sheet pan will work, though.
Brush with butter
Brush the tops with melted butter before baking and, if you want, again as they come out. It helps with browning and gives you that glossy, buttery top.
Common Biscuit Problems (and How to Fix Them)
When a batch doesn’t turn out, the cause is usually one of a handful of things.
- Dense or heavy: Usually overmixing, or too much flour from scooping instead of weighing. Stir only until the dough comes together, and keep the folds gentle.
- Flat, didn’t rise: Check your baking powder’s freshness first. Warm butter is the next suspect, so chill the dough or cut biscuits before baking. Twisting the cutter, or patting the dough thinner than about 1/2 inch, can also keep them low.
- Bitter, soapy, or metallic taste: That’s leftover leavening that didn’t get neutralized, which CSU specifically flags as the main biscuit issue at high altitude. Reduce the baking powder or soda slightly next time. Make sure you’re using real buttermilk (or soured milk) so the soda has acid to react with.
- Dry and crumbly: At altitude, the flour may simply need more liquid. Add buttermilk a tablespoon at a time until the dough holds together. Overbaking also dries them out, so start checking at 12 minutes.
- Tough or chewy: Too much handling. Fold three or four times, then stop.
- Pale tops, dark bottoms: Bake on the middle rack, brush the tops with butter, and consider a lighter-colored pan. Dark pans brown bottoms fast.
How to Serve Them
The obvious one first: split a biscuit and park it next to chicken-fried steak with cream gravy, then use it to clean the plate. This is the whole reason I wanted a reliable recipe, and it’s hard to beat.
They’re also great with chili. A warm biscuit next to a bowl of my Wyoming Whiskey Chili is a good argument for cornbread not being the only option. Break it up and drop it right in the bowl if that’s your style.
For breakfast, split them and go with butter and a drizzle of honey, sausage gravy, or a fried egg and some cheese. The recipe doubles easily if you’re feeding a crowd, or if you just want leftovers for the freezer.
Storage and Reheating
Biscuits are at their best the day they’re baked, but they hold up fine with a little care. These are general guidelines, so trust your eyes and nose.
- Room temperature: Once they’ve cooled completely, store them in an airtight container or zip-top bag for 1 to 2 days. Our dry air will stale them faster if they’re left uncovered.
- Freezing baked biscuits: Cool completely, wrap well or bag them with the air pressed out, and freeze for up to about 3 months.
- Freezing unbaked biscuits: This is my favorite trick. Freeze the cut, unbaked biscuits on a sheet pan until firm, then move them to a freezer bag for up to about 3 months. Bake straight from frozen at 450°F and add a few minutes to the bake time. Fresh biscuits whenever you want them.
- Reheating: Wrap biscuits in foil and warm them at 350°F for about 10 minutes (a bit longer if frozen). The microwave works in a pinch, but it tends to make them chewy.
High-Altitude Buttermilk Biscuits (Calibrated for 5,000+ Feet)
Yield: 8 biscuits
Prep time: 20 minutes
Cook time: 15 minutes
Total time: 35 minutes
Ingredients
- 2 cups (250 g) all-purpose flour, plus more for dusting
- 2 teaspoons baking powder (see notes for sea level)
- 1/4 teaspoon baking soda
- 1 teaspoon kosher salt
- 1 teaspoon granulated sugar
- 1/2 cup (1 stick, 113 g) very cold unsalted butter, cubed
- 3/4 cup plus 1 to 2 tablespoons cold buttermilk
- 2 tablespoons unsalted butter, melted, for brushing
Instructions
- Heat the oven to 450°F with a rack in the middle. Line a baking sheet with parchment paper.
- In a large bowl, whisk together the flour, baking powder, baking soda, salt, and sugar.
- Add the cold cubed butter. Cut it in with a pastry cutter, two forks, or your fingertips until most pieces are pea-sized, with a few larger flat pieces remaining. If the butter softens, chill the bowl for 5 to 10 minutes.
- Pour in 3/4 cup of the buttermilk and stir gently with a fork just until a shaggy dough forms. If dry flour remains, add more buttermilk 1 tablespoon at a time (up to 2 tablespoons) until the dough just holds together. Do not overmix.
- Turn the dough onto a lightly floured surface and pat it into a rough rectangle about 3/4 inch thick. Fold it in thirds like a letter, rotate 90 degrees, and pat it out again. Repeat for a total of 3 to 4 folds.
- Pat the dough to about 1/2 inch thick. Using a floured 2 1/2-inch round cutter, press straight down and lift straight up without twisting. Gently press the scraps together and cut the remaining biscuits, for 8 total.
- Place the biscuits on the prepared baking sheet, just touching for taller, soft-sided biscuits or about 1 inch apart for crispier edges. If the dough feels warm, refrigerate the pan for 10 minutes.
- Brush the tops with melted butter.
- Bake for 12 to 15 minutes, until risen and golden brown on top.
- Brush with any remaining melted butter, if desired, and serve warm.
Notes
- Sea-level version: Use 1 tablespoon (3 teaspoons) baking powder, keep the baking soda at 1/4 teaspoon, and start with 3/4 cup buttermilk, adding more only if needed. Bake at the same 450°F for 12 to 15 minutes.
- Fine-tuning at altitude: If your biscuits taste bitter or soapy, reduce the baking powder slightly next time. If they taste great but you want more height, increase it by 1/4 teaspoon. Change one thing at a time.
- Buttermilk substitute: Stir 1 tablespoon lemon juice or white vinegar into enough milk to make 1 cup, rest 5 to 10 minutes, and use as directed. Results will be close but not identical.
- Make ahead: Freeze unbaked cut biscuits on a sheet pan, then bag them for up to about 3 months. Bake from frozen at 450°F, adding a few minutes.
- Storage: Airtight at room temperature for 1 to 2 days. Reheat wrapped in foil at 350°F for about 10 minutes.
If you bake these, I’d love to see how they rose, especially if you’re up here at altitude with me. Tag @wyofood on Instagram or find Wyo Food on Facebook and tell me your elevation and how they came out. If you tweaked the leavening for your kitchen, share that too. Somebody at 7,000 feet will thank you.
— Sean